Colorado Pond Cleaning Services

Should you run the pond over the winter?

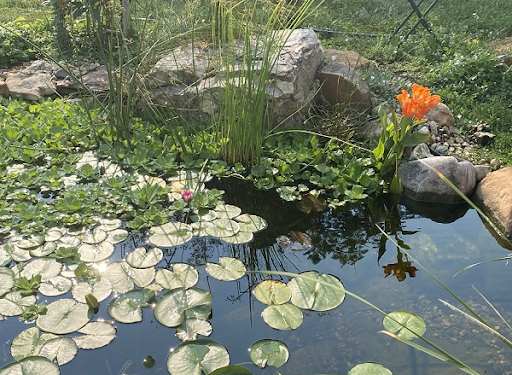
Answer these 5 questions to find out if your backyard pond be run over the winter!

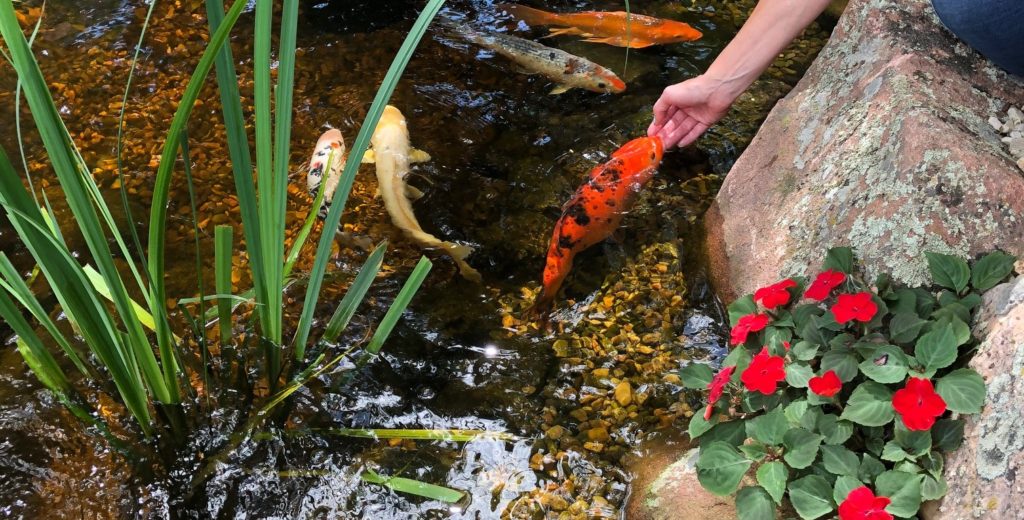
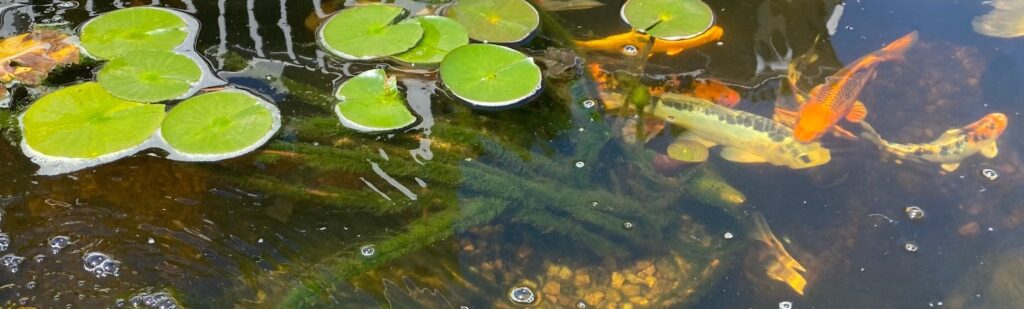
  1. Are there fish, frogs, and other aquatic life in or at the pond?
  2. Is the system currently free from any water loss (besides evaporation)?
  3. Are you going to be home this winter (not gallevanting around the world)?
  4. Is it easy to add water to the pond with a hose in the winter time if it is needed?
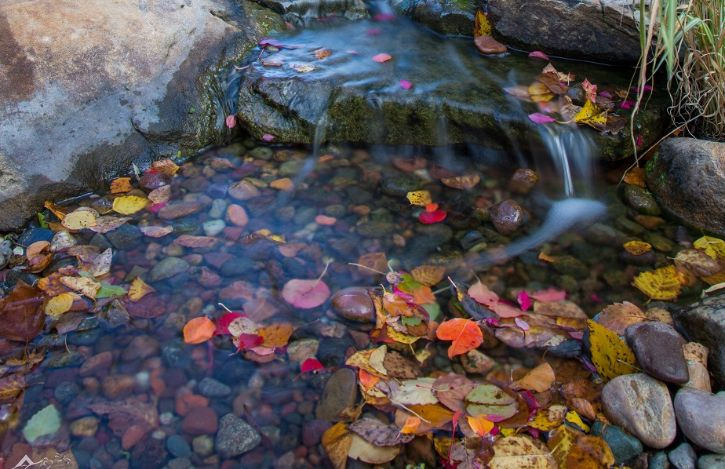
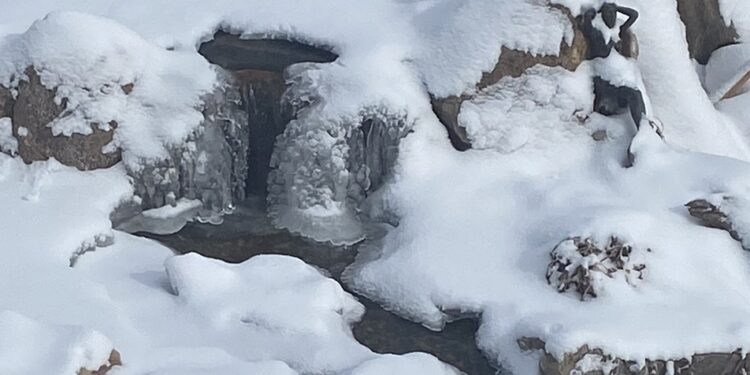
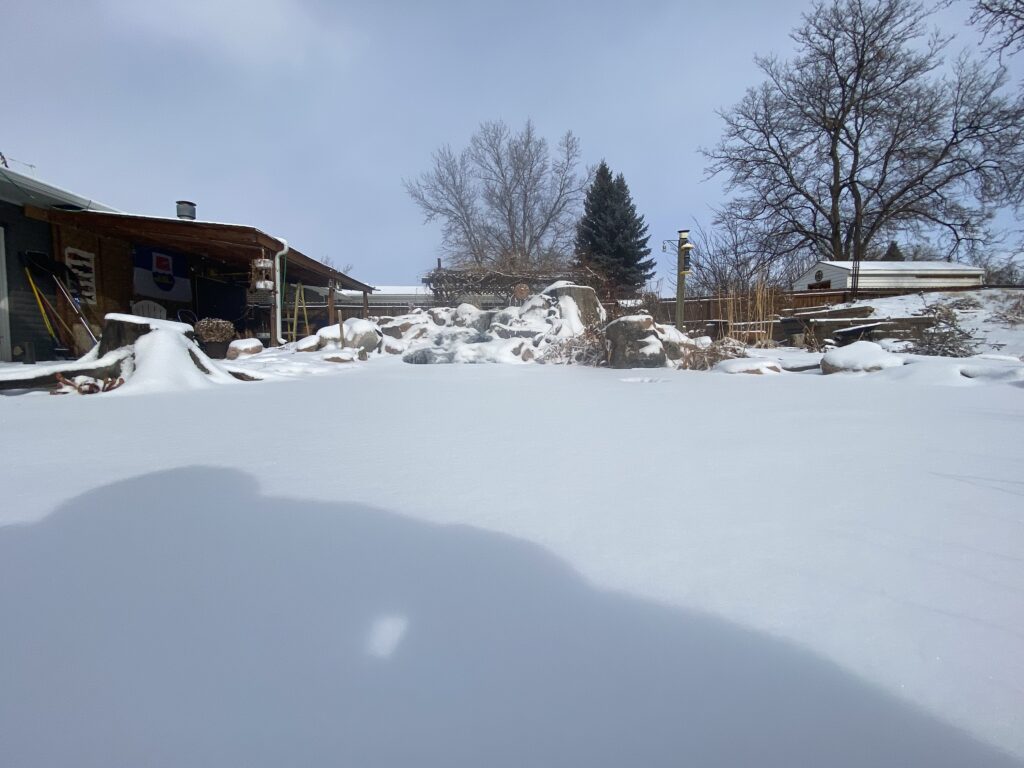
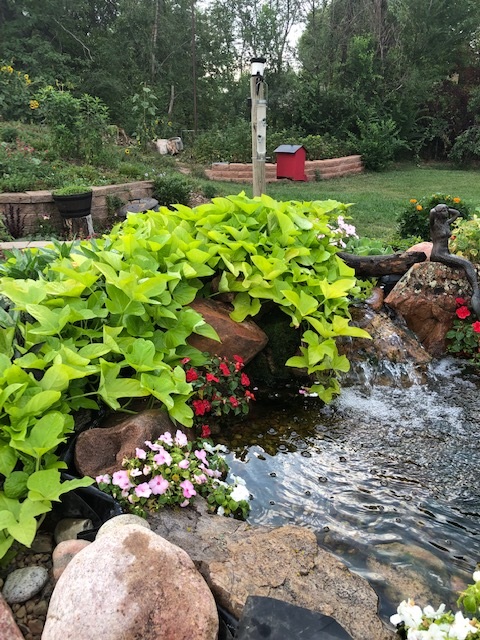
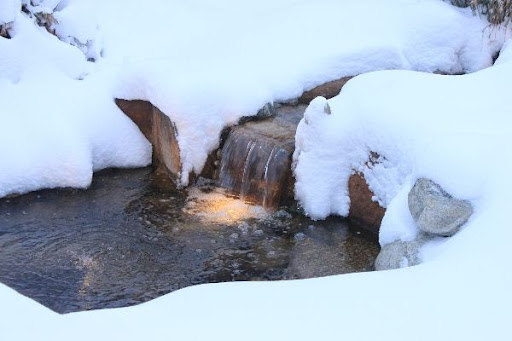
  5. Do you love the look of flowing water surrounded by billowy snow?

If you answered YES to all these questions:

Running your feature is the way to go!

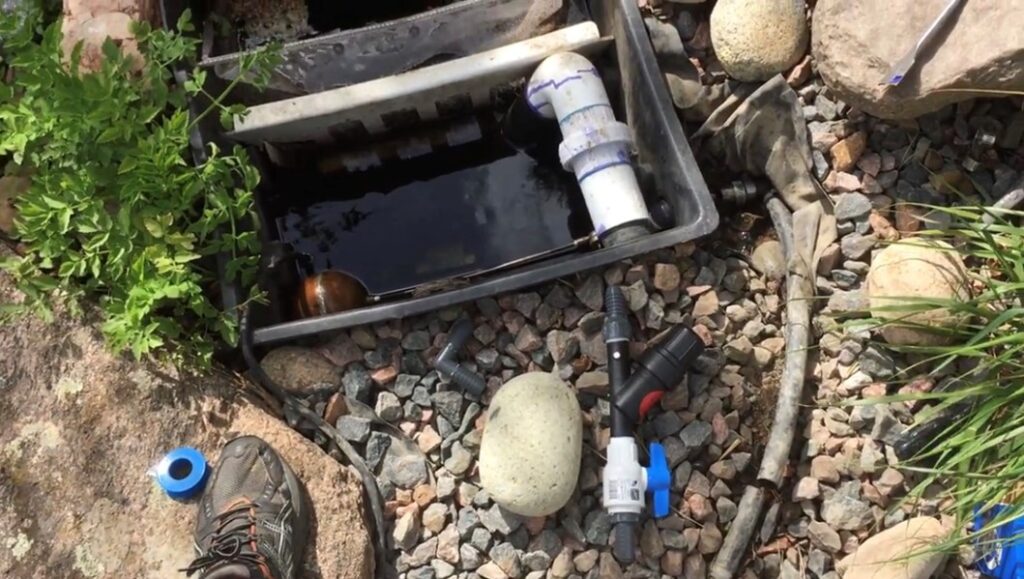
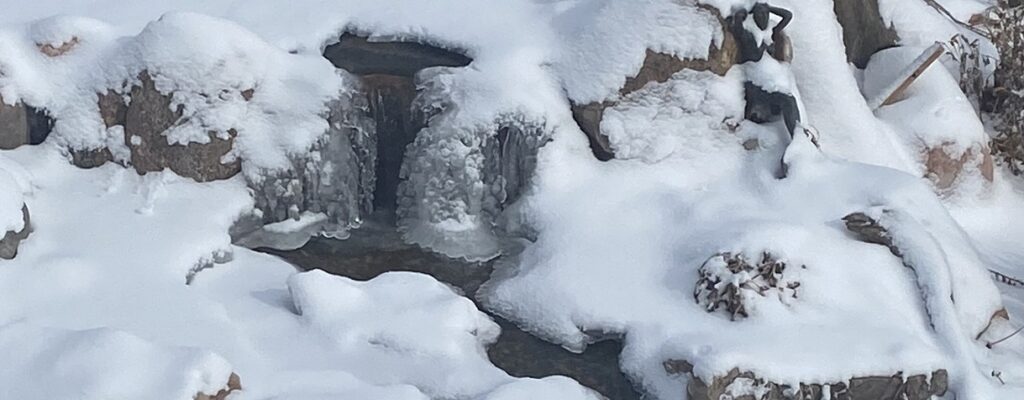
  • Once you decide to run the pump over the winter, make sure you run it continually all season long. Do not turn it off even if it gets really cold. Some people make the mistake of turning the pond pump off at night. This can be catastrophic during freezing temperatures. Moving water (i.e. the water in the pipes) won’t freeze as long as it keeps moving. If you have exposed pipes, the severe cold can cause freezing so covering or insulating them is a good idea.
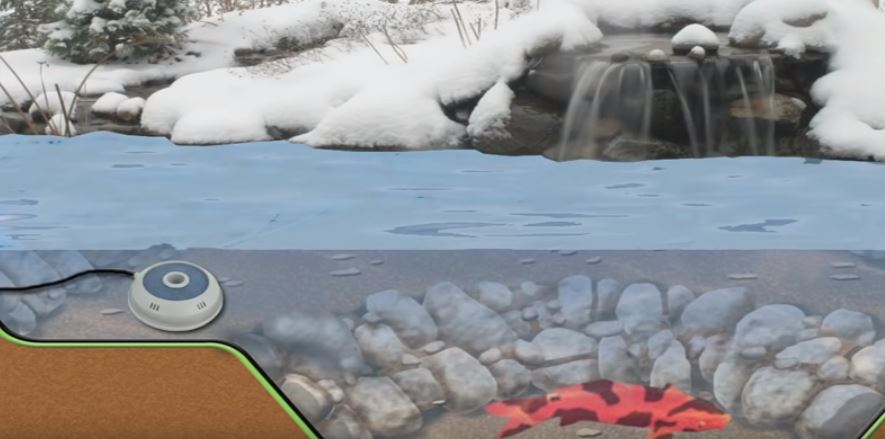
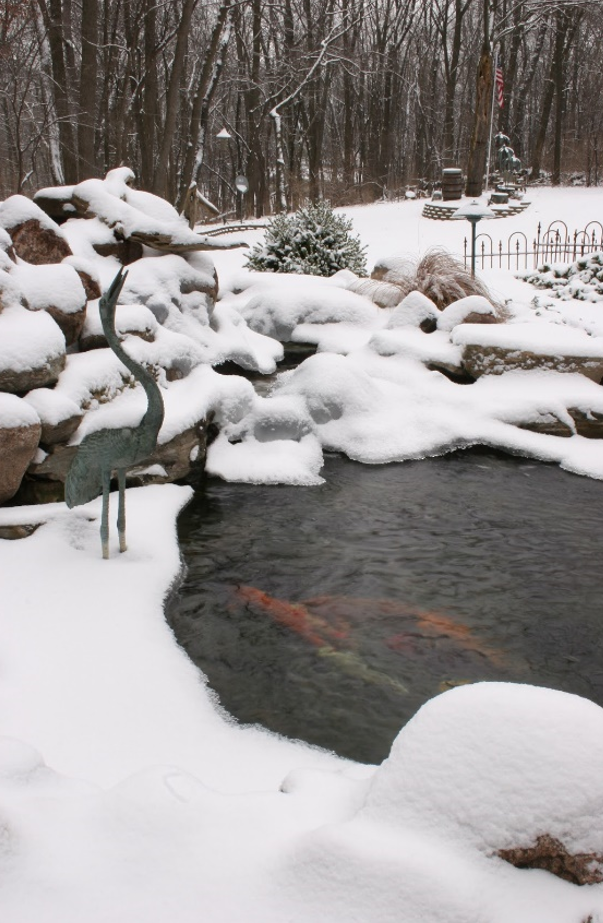
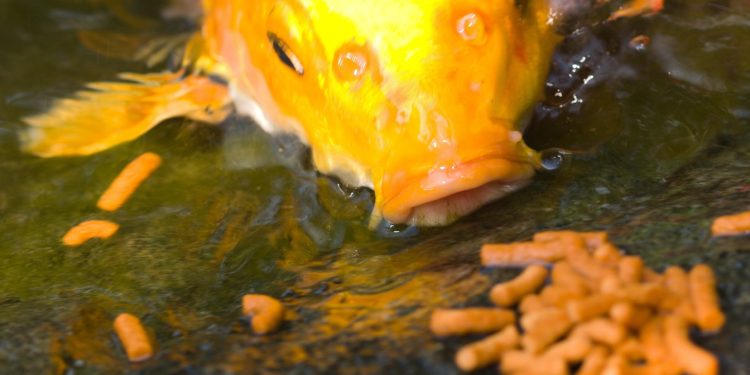
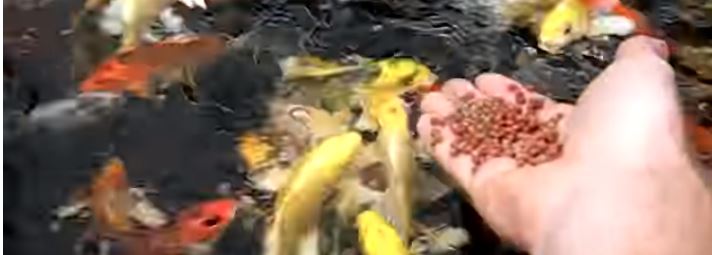
  • Running the pumps over the winter helps keep the fish healthy by circulating the oxygenated water. Fish go into a dormant state called “torpor” during the winter. While they are in this state they don’t need to eat and will hardly move at all. They may stay at the very bottom of the pond or in a fish cave where you can’t see them—this is the warmest place in the pond.
  • Remember that if there is an air stone at the very deepest part of the pond it is bringing in the coldest air to the warmest place fish have. Place aerators on the higher shelves.

If you answered NO to any of these questions:

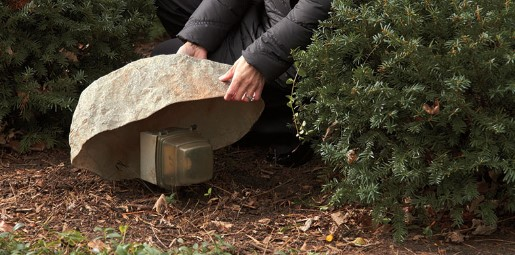
You may want to consider removing your pump for the winter.

  • This might be a good decision if it is difficult for you to top off the water when it is needed and if you travel often.
  • Also, if your system is losing water from the stream or waterfall and you are unable to remedy the issue, turning off the pump may help you get through the winter without worry over water loss.

What if I have fish?

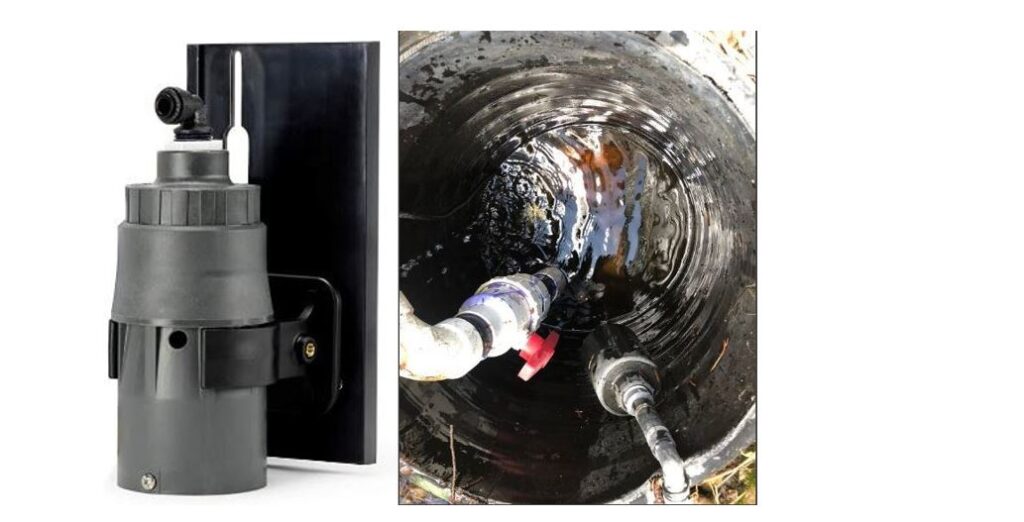
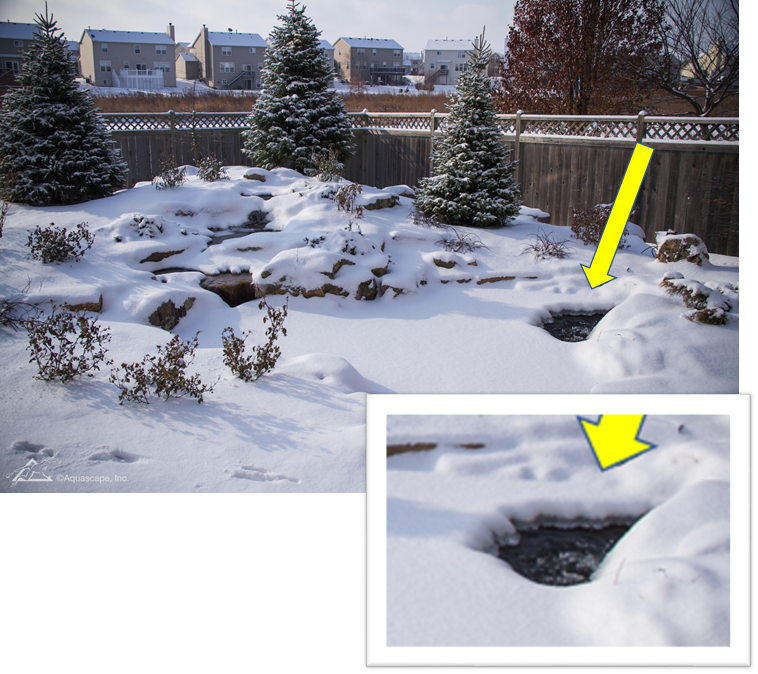
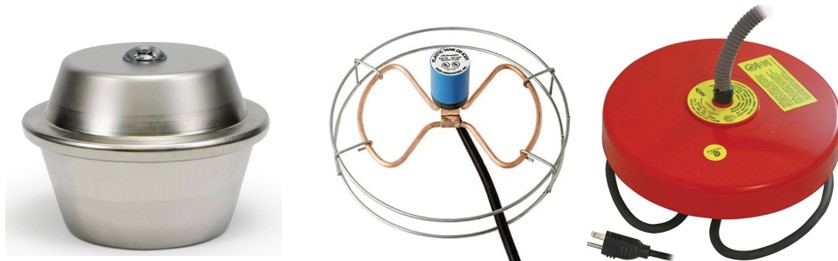
  • If you have reasons to leave the pump off but there are fish, make sure that you have a floating de-icer to keep a hole open in the ice and aerators in the pond at an upper level. Although circulation is somewhat better, fish can overwinter without the pump running.
  • We do not recommend running an in-pond pump that merely moves the water without sending it over a stream or waterfall. This does not oxygenate the water and does little more than mix up the warmest and coldest water in the pond.

To put it simply:

Running the pump = Great! But the pond still needs aerators and a de-icer.

NOT running the pump = That’s fine, too! But the pond needs aerators and a de-icer.

Kristi’s Pond Tips

   Plug the de-icer (heater) and aerators into a plug separate from the one the pump is plugged into. That way, if the GFCI pops and the pump goes out, the fish still have aeration and an open hole for gas exchange. If the de-icer and the aerators lose electricity you will have a little more time to rectify the situation because the pump is running, providing oxygen and hopefully keeping an area of ice open near the bottom of the waterfalls.
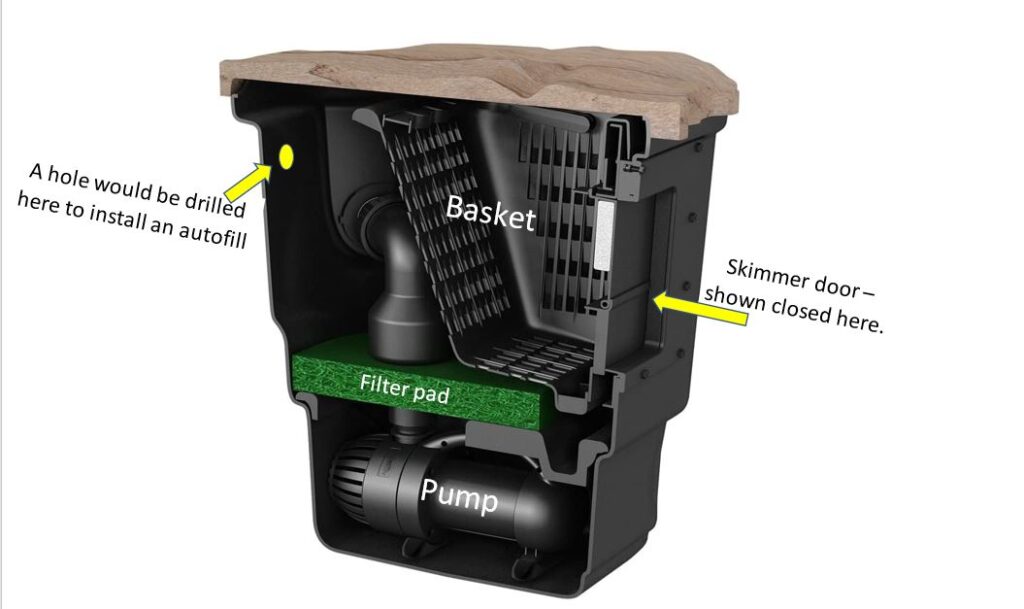
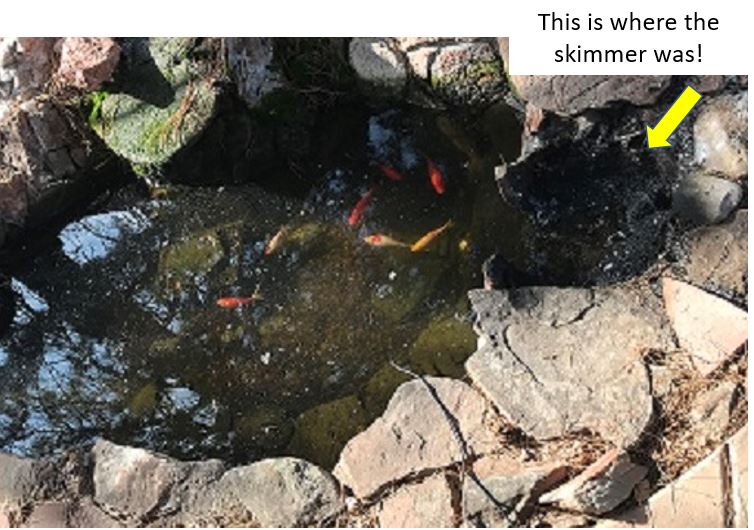
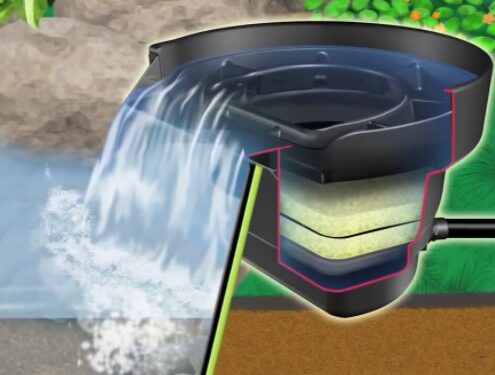
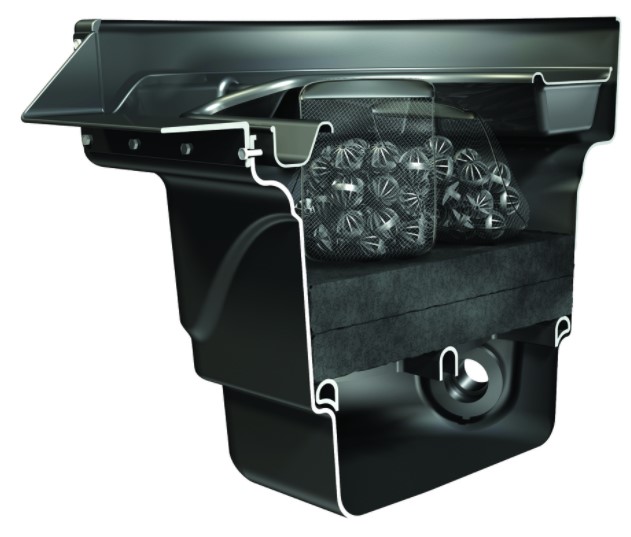
  If the skimmer has an adjustable skimmer door, put it at its lowest point over the winter. When the pond ices over, the liquid water level may decrease, starving your pump of water. (This keeps you from having to go out into the cold to lower the skimmer door.)

   Keep a hose in the house (where it is warm) to use when you have to add water. This should not happen often, but when ice builds up water may need to be added. Remember: the hose must be detached from the spigot or it can freeze and cause a pipe break, potentially flooding your house!
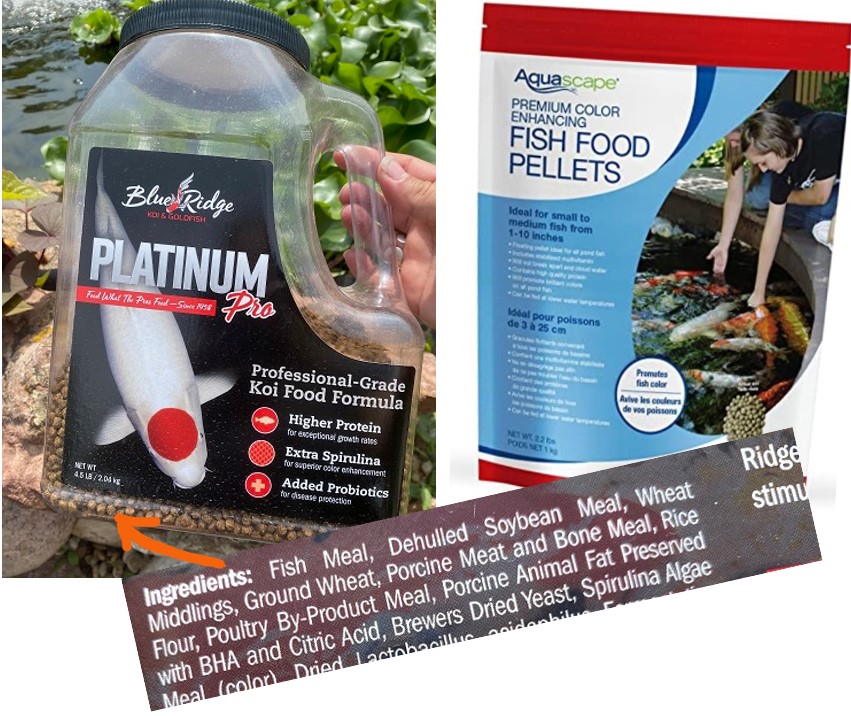
 Switch to cold water bacteria as the pond temperatures reach 50 degrees.

   If winter pond care sounds like too much for you, call us! We offer winter pond care so you can keep cozy while the pond stays healthy.

If you’re looking to install an outdoor water feature, we can help! Contact Colorado Pond Pros for residential and commercial installation, renovation, cleanouts, and repairs.Your content goes here. Edit or remove this text inline or in the module Content settings. You can also style every aspect of this content in the module Design settings and even apply custom CSS to this text in the module Advanced settings.

10 Tasks to Get Your Pond Ready for Fall

Did you know that September 22nd was the first day of fall? It was! The temperatures have gotten colder at night, but it’s still nice and warm in the daytime. The leaves have begun to change and the morning dew has returned. The days have gotten shorter and the nights are darker. All the signs that fall is upon us are appearing! It’s the time of year to take care of your pond so it stays healthy for the winter and gets a leg up come springtime.

If you don’t properly prepare your pond now, organic material left in the pond over the cold season can cause winter algae blooms, which can throw the ecosystem off balance and negatively affect the fish. As the plants go dormant for the winter, they cease to process nutrients in the water. While the fish produce less ammonia, leaves and other debris slowly break down over the winter without the plants helping to break them down.

Here are 10 things you can do to get your pond ready for fall:

1. Trim the plants

  • Remove all floating plants
  • Clip plants down to 4 inches above the base of the plant
  • Make sure all water lily pots are at least 24 inches down. They can be moved to the lowest part of the pond for the winter, but make sure the fish are not being crowded out.
  • Cut back lilies once the leaves have turned brown.
  • Prune plants that may be growing outside of the pond but are hanging over it.

2. Net the pond!

There are a couple different ways to put up a net over the pond. Here are some things to know:

  • A small pond can be netted using a dome made of PVC. The PVC will hold up through the weather best if it is put onto rebar that is stuck in the ground just outside the liner. While sticking it between rocks works for a bit, if it snows the weight will easily pop it back out.
  • A larger pond can be netted using stakes and rope. Make sure to secure the sides with large rocks. Small ones will be pulled in by the weight of snow.
  • Make sure to net BEFORE the leaves start falling and don’t leave it on all winter.

3. Bring in equipment like the Autodose and IonGen

They don’t hold up well if left out all winter. See our blog on Should Your Pond Equipment Be Out In the Weather? No! for more info on how to protect your electrical equipment.

4. Make sure all electrical equipment is covered

Another reason to check out our blog on Should Your Pond Equipment Be Out In the Weather? No! is for the links to our friends at The Pond Guy and True Pump. They can help you find some artificial landscape rocks and stumps to cover and protect your electrical equipment.

5. Switch from regular to cold water bacteria

When the temperature drops below 50 degrees, you’re going to need to switch from regular to cold water bacteria. Try The Pond Guy or True Pump.

6. Bring liquid bacteria into the house or a garage where it won’t freeze

7. Remove debris from the pond

Try to net out any debris you can see. If leaves manage to get through the net, make sure to remove them.

8. Check your skimmer basket often!

The more trees you have nearby, the more likely it is that leaves will clog up the skimmer basket or net. Clean it out as often as you can. (And did we mention putting up that net?!)

9. Remember to slow down feeding the fish as we go into the fall

Starting now, give those fish a little bit less. Pay attention to how much they are eating and only give enough so they finish it within a few minutes. Switching to fall food helps, too. It has a lower protein content and is easier to digest. Once the water temperatures reach 50 degrees you need to stop feeding them for the winter.

10. Watch the water level

Remember that if you have an Autofill, it will no longer be filling up the pond when water gets low. Perhaps there has been water loss that has gone unnoticed. It will be noticed now. If the water level in the pond is going down more than two to three inches in one week, there could be a lower liner somewhere. Fix this before winter hits!

Pro Tips:

  • If there are smaller leaves that get through the net, double the net over to create smaller spaces for them to get through.
  • Keep an eye on the net. Sometimes small birds will get caught in them. Set them free!
  • Keep a hose somewhere in the house so that if the pond needs more water when it is really cold, you won’t have to deal with a frozen hose!
  • If you are putting in stakes for a net, never put them inside the liner!
  • Take care when trimming plants. Causing a leak by nicking the liner would be no fun!

Most importantly, if you have any questions about your backyard pond or water feature, contact us at Colorado Pond Pros today! Pond installation and pump repair are our business and we’d be happy to help!

And be sure to check out this helpful info on-

How to Clean Out Your Pond Pump

How to Do a Leak Test

10 Things You Need to Know if You Just Got a Pond

Microbial Algae (green cloudy water) -What to Know

What is it? (Green cloudy water!)
Do you have it?
What can you do about it?

microbial algae
Microbial algae look like cloudy, pea soup. It can’t be picked up or grabbed.  It may also be referred to as suspended algae. You may have other algae, but if your water doesn’t look like this, then you don’t have it. 

The #1 thing to know about this microbial algae is that there is no magical, instant fix for it and the remedy completely depends on a variety of things.

Don’t despair, let’s just take a look at your pond and ask yourself  these 12 questions if there is green cloudy water – count how many no’s you get:

  1. Am I running the pump all the time?
  2. Do all areas of the pond have good circulation?
  3. When feeding the fish, does some of the food go uneaten?
  4. Is the pond covered roughly 40% or more in plants that grow in the water?
  5. Are bacteria added every week (EVERY WEEK) or on a regular basis through an Autodose?
  6. Are the bacteria being added kept in a cool place where it doesn’t get above 90 degrees?
  7. Is there gravel (1 inch round to 3/4 inch round) on the bottom of the pond, in the stream, and throughout the system?
  8. Does the waterfall have a biofall? (this is a tub where the waterfall or stream begins that has filter pads and biological filter media)
  9. Is there a skimmer box?
  10. Is there a filter pad in the skimmer box?
  11. Is the pond basically clear of debris on the bottom?
  12. If you have a UV light or pressure filter with a UV light, are you sure the light is working?

Green cloudy water
This is a pond when the microbial algae was going nuts.  The bottom picture is after it is under control.

If the pond has microbial algae and you answered “No” to any of these questions, read the discussion next to the corresponding number.

  1. The pump needs to run all the time in a pond (if you have pondless waterfall it’s ok to turn it off).  Leaving stagnant water is a recipe for algae.
  2. If you have dead zones, consider putting in a pond jet or aerator in that spot to move the water.
  3. Only feed fish what they can eat in a few minutes.  Stand and watch them eat to be sure.  Uneaten food contributes to muck and algae.
  4. Plants are the workhorse of the pond!  They are the filtration Mother Nature chooses, why ignore that?  The pond should have 40 to 60% plant coverage.  That means submerged plants, floating plants, and plants whose feet are in the water but the foliage is in the air.
  5. An Autodose will dose bacteria every day. Bacteria need to be added every week and extra when there is high heat or just after rain.
  6. Liquid bacteria must be kept in a cool place where it doesn’t get above 90 degrees and does not freeze.  Otherwise, it kills the bacteria, rendering it useless!
  7. Gravel (1 inch round to 3/4 inch round) on the bottom of the pond, in the stream, and throughout the system provides bacteria a place to colonize.  Without this or other places for bacteria, it will just die.
  8. A biofall provides another place for beneficial bacteria to colonize (this is a tub where the waterfall or stream begins that has filter pads and biological filter media)
  9. A skimmer box helps remove debris from the pond before it sinks and decays.
  10. A filter pad in the skimmer box provides not only mechanical filtration to keep muck and leaves out, but it provides yet another place for beneficial bacteria to colonize.
  11. Debris on the bottom of the pond contributes to algae.  If there is a bit there, it needs to be cleaned out.
  12. If the pond has a UV light or pressure filter with a UV light that is working, it will kill microbial algae.  This is something to be used in the absence of a biofall, gravel, and plants.

Pro Tips:

  If the pond has green cloudy water, consider how often you are feeding the fish.  If you feed them once a day or more, cut that amount in half.
  Adding plants is not always easy.  Floating plants are fantastic filters!  Add floating lettuce or hyacinth.  If you are worried they will get stuck in the skimmer put them in a small hula hoop that you can secure in place.
If you supplement the steps you are taking with adding a fine filter, make sure to keep an eye on it as it will clog your system very quickly and maybe even stop water from getting to the pump.  It can be cleaned and used again.
   Adding flocculant can help when treating microbial algae.  It causes organic material to bind together, allowing it to be caught by the find filter pad more easily.

Learn more about your algae in Algae 911!

The pond autofill

The Pond Autofill

The pond autofill is most commonly attached to a zone in the sprinkler system. The autofill tops off the pond when the water gets low. This saves you from having to drag the hose over to the pond each week.


This is the autofill before it goes into your system.

How does the pond autofill work?

The autofill works just like the float in the tank of a toilet. For instance, when the water level goes down in a pond, the float sinks along with the water level and therefore, allowing the valve to open. When the sprinkler zone attached to the autofill is activated water will flow in if the float has sunk. After that the water will stop when the water level comes back up to normal pond level and the float, floats back up, shutting off the valve.

If you don’t have a pond autofill and the pond water goes down, how do you know it’s not just evaporation?

In Colorado 1 to 3 inches of evaporation IN 1 WEEK is normal.  It doesn’t matter how large or small the pond is.  NO, it doesn’t. One type of autofill looks similar to a toilet bowl float (below). There are other kinds of autofills.

the pond autofill


Here is a pond autofill in action.

How should an autofill be installed?

The most typical placing an autofill is inside the skimmer. To install it a hole is drilled through the top side in the skimmer and set at just the right place to keep the pond water right where it should be. The picture below shows a cross section of an Aquascape skimmer. The autofill in this type of skimmer allows larger debris to be caught in the basket. A skimmer basket like this allows water to reach the autofill before it reaches the filter pad. The filter pad strains out smaller debris to protect the pump.

The wye strainer, pressure reducer and ball valve – a critical part of the pond autofill

For best results, install the autofill with a wye strainer and pressure reducer. The strainer catches small debris to keep the autofill valve from getting clogged and causing the valve to get stuck open and overflowing the pond. Minerals in the water can build up and impede the autofill valve from closing. Without a wye strainer the autofill valve gets stuck open the pond can over fill, flooding the surrounding areas.

When the autofill is attached through the sprinkler system it is highly likely to get small pieces of irrigation plastic in the water. This can happen as the irrigation system is worked on and trimmed or new pieces are inserted into the liner. These tiny pieces of plastic are enough to affect the autofill if not caught by a wye strainer. The surface area of the strainer is great enough that it rarely has to be opened up and cleaned out.

What about the pressure reducer?

A pressure reducer makes sure the pressure cannot get too high and blow out the autofill. If the pressure does not need to be reduced, it has no affect. It is more of a fail safe.


This skimmer has a net and a verticle filter pad. The copper ball in the bottom left of the skimmer is an autofill float. The pressure reducer and wye strainer are circled here before they are installed.

The pressure filter reduces the water pressure to the autofill coming from the sprinkler system. An Autofill does best when the psi (ponds per square inch) is between 10 to 15. Did you know that different cities and even different neighborhoods may have variance in water pressure? Boulder has some of the highest water pressure is often between 120 to 135 psi.

A ball valve installed directly before the autofill is not comopletely neccessary but comes in handy. It allows the autofill to be turned off when maintenance is done on the pond. A simple turn of the blue hande keeps it from filling up the pond while it is drained for cleaning and repairs (shown below).

What if I don’t have an Aquascape skimmer?

There are many types of skimmers. The skimmer shown below has a net and a verticle filter pad. While many autofills are installed just over the pump, there is a risk to this set up. When the net and filter pad become clogged, the water level in the skimmer box is normal, but the water does not make it to the autofill, causing it to continue filling and even overfilling the pond! To keep this from happening, make sure you are cleaning out the net and cleaning the fitler pads at least once a week. During the Fall when there are leaves in the area it may have to be done more often.

Skimmer with the pond autofill

Alternatives to skimmer pond autofill placement

When the skimmer is not the best option for the skimmer placement (like a floating skimmer) a hudson valve can be installed directly in the pond, on the side and hidden with rocks. Make sure to install is low enough that the pond is not accidentally over filled.

The Hudson Valve

A hudson valve is another type of autofill that takes up less room than a traditional or company autofill. the float mechanisim is inside the round piece. A hudson valve must be installed vertically. (The hudson valve is shown below on the left and on the right is seen in a pondless waterfall vault.)

the pond autofill

Detecting water loss and what is NORMAL?

In Colorado 1 to 3 inches of evaporation IN 1 WEEK is normal.  It doesn’t matter how large or small the pond is.  NO, it doesn’t. 

How to test the autofill to make sure it’s working

To test the autofill, turn on the sprinkler zone that the pond autifll is attached to and hold the float down. It the valve allows water to come in, the valve is working.

Another way to test it is to turn that sprinkler zone off, or tie up the float so it does not come on. Left for a week, the pond water should evaporate roughly 2 inches. Allow the float to be let loose while the sprinkler zone is on and watch to see if the water does, in fact, start to fill.

Why is it important to keep an eye on the water level?

When there is water loss and it goes unnoticed:

  • the pump could burn out
  • fish could die if water gets too low

If an autofill is present water loss may go unnoticed but there will likely be signs:

  • The fish are getting sick and you can’t seem to pinpoint what is going on.   This is adding chlorine to the pond which can hurt the fish. We recommend using an Autodose if you have and Autofill to protect fish from unexpected chlorine. 
  • There are crazy amounts of string algae that are not normal for your pond. A pond autofill will continue to replenish the water even when there is waterloss; subsequently upsetting the balance of the eco system and causing algae!  If you notice an abnormal level of stinr algae, test the pond for waterloss.
  • A higher than normal water bill points to the need to do a leak test on the pond.

Testing for pond waterloss

  • What if there is an autofill?
    • To do a leak test the ball valve must be closed. The test must be done without interference from added water. This includes rain. If it rains, hold off on the test until things are drier.
    • While performing a water test, the ball valve should be closed. A ball valve allows the autofill to be turned off without turning off the entire sprinkler zone.
    • To stop the autofill from running without turning the sprinkler zone off tie it in place with string.
  • Turn off the waterfall for the day or 24 hours (Healthy fish will be ok for this short period of time) Fill the pond to its normal full level.
  • Measure the level of the water in the pond. No, really. Measure from a flat rock or the top of the skimmer down to the water level to get accurate information.  Eyeballing it is not accurate. 
  • Check the water level at the end of the day or the next morning.  24 hours is a good basic look at how the water is holding. 

Water didn’t recede with this test?

When the water level doesn’t go down at all, the waterfall needs to be tested as it may be losing water.  
When the water does go down in this test there is waterloss in pond itself.  Allow the water continue to recede until it stops but, don’t go longer than a day or 2.  Where the water levels off at is where the leak is. It may be from low liner, a puncture or and issue with a faceplate.

If you have a pondless waterfall the same thing applies, just mark the level of water in the water retention area. 

Autofill Conclusion

Pond autofills are a fantastic piece of equipment at that will save you time. Make sure you understand how it works and that it is installed correctly. Need help? Contact us now to talk about having an autofill installed in your pond.


winter pond waterfall

Preparing the pond for brutal cold: Are you ready?


Colorado Pond Pros:
Winterizing Pond Tips

Frigid temperatures should not worry pond owners. Preparing the pond for brutal cold can be the difference between snuggling under a blanket with a good book during extremely cold weather or searching for the long johns. Preparing the pond for brutal cold isn’t difficult!


winterizing koi pond


1. Make a decision about running the pond pump over the winter or not.  


We generally recommend that if the pond has fish, it should be run over the winter. Moving water in a pipe doesn’t freeze, so this will protect your pipes. Ponds and waterfalls covered in snow can be a beautiful winter sight. If you do not want to run the pond over the winter there are other considerations.  Give us a call if you want to talk about it. 


winterizing koi pond


2. Cover your pond outlets now.  


Electrical outlets will be less likely to have an issue if they are protected. There are a variety of fake rocks with different looks to match your pond rocks. 


winterizing koi pond


3. Pond Heaters.  


Heaters are great for two things:  Keeping a hole open in the ice for gas exchange over the winter to keep fish alive, and keeping the water from freezing right in front of the skimmer. A heater floating somewhere in the middle of the pond is helpful for gas exchange. 


Pond heater or deicer


4. Skimmer heater.  


Right before huge temperature drops, putting a floating heater in front of the skimmer can really help. When water freezes it could block the skimmer opening and thus starve the pump.  The heater on the far left is an Aquascape brand deicer.  It’s perfect for letting out gases and uses the least amount of electricity as it only comes on when there is a risk of freezing water.  The two on the right are fabulous for in front of the skimmer and short-term usage, as they use more power and keep more water from freezing. 


winterizing koi pond


5. Never put a heater inside the skimmer.  


Although it is unlikely, there was a pond a few years ago that suffered water loss when a heater was put inside the skimmer. The heater ended up touching the side of the plastic and melting it, catching it on fire. It melted the pond liner too.


winterizing koi pond


6. Aerator Placement  


Aerators are great for the winter to keep a steady oxygen supply to the pond.  However, they should not be placed on the very bottom of the pond because they bring in the cold air and this disturbs the water temperature.  Remember that the bottom of the pond is the warmest during the winter and the fish would like it to stay this way!


winterizing koi pond


7. Other Equipment – Preparing the pond for brutal cold


Remove other equipment.  UV lights need to be removed for the winter (noted, never touch them with your bare skin).  If you have an Autodose or Iongen it is a good idea to protect them during a cold snap or remove them altogether. They can be removed for the winter and put back in the spring.  If they were installed down in the dirt, put a large stone marker on top, so no one unknowingly steps into the hole and gets hurt. Sometimes it is difficult to tell where the pond is exactly! 


winterizing koi pond


8. Keep an eye on the biofall. 


Last year some ice formed at the top of the biofall.  It diverted water out of our system.  If the biofall is covered by a large rock before the cold weather hits, this can be avoided. 


winterizing koi pond


9. Don’t break the ice.


Remember that once the pond freezes over (except for the hole for gas exchange) not to break the ice. It actually protects and insulates the pond from the wind and harsh temperatures. Sometimes breaking the ice can lead to water from the waterfall ending up on top of the ice instead of under it, leading to water loss and a mad scramble to coax the water under the ice.


10. Set the lights up on a timer for the winter.


Softly glowing lights under the ice or against a backdrop of snow adds a point of interest in an otherwise white landscape.


More Pro Tips:


winterizing koi pond  If you add a second heater, plug it into a separate outlet.  The non- Aquascape heaters draw a lot of electricity.  Avoiding tripping a circuit is a good idea. 


winterizing koi pond  Keep an eye on dogs when they go out if it is difficult to tell where the pond is.  Usually when it is like that the ice is thick enough to hold a dog, but better to be safe!


winterizing koi pond  Plug the aerator into a different outlet than the pump.  That way if the pump has an issue, the aerator will still provide oxygen and a hole for gas exchange.


winterizing koi pond  If your skimmer has a height adjustable skimmer, put it down low when really cold weather is on the way. Although we normally want it higher, if the ice gets thick enough to block water flow into the skimmer, it is better to have it lower.


winterizing koi pond  Remember that even though there is no water loss, you may have to add water when there is a good amount of ice accumulation. As ice forms, there is less water to circulate. Keep a hose in the house so that if you need to add water there is a warm hose available that will be easier to work with.


Would you like to discuss the winter needs of your pond or would you like us to check your pond for you? Contact us now, just click HERE.

 Click here to learn more about our backyard pond services!


Pond Lighting backyard water feature

Aquatic Pond Lights – What you need to know!

pond servicing near me
Aquascape Aquatic pond lights

We use Aquascape LED lighting. Here’s why:

  • They can be installed fully submerged in water or out of the pond in the landscape.  
  • They are extremely energy efficient, minimizing energy costs and providing a 90% savings over comparable halogen lighting.
  • They are LED lights and provide light equivalent to a 10-watt halogen light.

Options:  There are 3-watt spotlights, 1-watt spotlights and 1-watt waterfall lights.  They are available and in white or colored lights. 

Electricity: Lights require a 12-volt transformer. They come with a 14.5 foot long cord. 

pond servicing near me
These are the most common lights requested here at Colorado Pond Pros. Did you know there are also 6-watt spotlights and lights that change color?

Pro Tips:

pond servicing near me  Make sure lights are placed pointing away from the viewing area – don’t point towards the area the pond will be viewed from, as it can feel like the light is poking us in the eye!
pond servicing near me  Soft lights under each waterfall level highlight the movement of the water. Lights in the pond turned away from the viewing area brings out the depth in the water and allows us a great view of the fish once the sun sets.
pond servicing near me  Fish need nighttime too.  Use the light timer to set the lights to turn off in 4, 6 or 8 hours after dark. 
pond servicing near me  The best time to add lights (besides when the pond is built) is DURING A CLEANOUT!  

backyard water feature

Biofall – what is it? Does your pond have one?

koi pond backyard water featureA biofall is a sort of tub. It is the beginning of the waterfall.


koi pond backyard water featureThe water comes from the pump in the skimmer (if the pond has a skimmer) and goes through a pipe up to the biofall.  


koi pond backyard water featureNotice that the pipe enters at the bottom of the biofall so that the water goes through the filter pads before it can get to the top and overflow into the waterfall or stream. 

Biofalls provide filtration!

koi pond backyard water feature
In this cross-section picture you can see the place where the pipe would come in at the bottom. The water would then go through the 2 filter pads as it fills up, passing through the bioballs before coming out the spillway.

koi pond backyard water feature
The biofalls are hidden at the top where the water begins!

Hiding the biofall

The top tray of the biofall is made to help hide it.  Rocks are often used to hide the black plastic.  This is the biofall on my pond in the summer.  I had a piece of driftwood on it and added water lettuce and some sweet potato vine that was planted in the dirt just outside the biofall.  The sweet potato vine quickly grew over it and grew roots right into the water and created a beautiful green blanket. 

koi pond backyard water feature

Pro Tips :

koi pond backyard water feature Beneficial bacteria needs to be mostly undisturbed in the biofalls to do its job.  As it breaks down waste it will get sludgy.  They should be removed and cleaned out about once a year.  A good time for this to be done is at the cleanout.  (Yes, we do this when we do a cleanout!)

koi pond backyard water feature

Cleaning filters in the biofall too often actually hinders them from doing their job!


koi pond backyard water featureWater hyacinth and other plants are a fabulous way to hide biofalls and you’ve got to keep an eye on them!  My water hyacinth grew so much they diverted water out of my system.  Keep plants from overflowing the biofalls. 


koi pond backyard water featureAdd beneficial bacteria once a week to the pond in the spring and summer months.  You can add some directly to the biofall, but you don’t have to.    


koi pond backyard water feature In the winter many people do not add bacteria at all.  If this is working for you I say, do what works!  If your pond could use a little more help, add cold water bacteria in the winter. 

koi food

Koi food – What to know

The Basics when it comes to koi food:

  1. Feed fish only what they can eat in a few minutes.
  2. Don’t throw in food and walk away! They need to be watched so you know if they have eaten all the food.
  3. They can be fed at different frequencies depending on your pond environment and expectations. During the summer:
    • When the pond is full of plant life, some algae and other living things like bugs, then it may be fine to feed them once a week.
    • No plants and very little life in a pond? You’ll need to feed the fish everyday at least once.
    • If you are trying to help the fish grow and want them to come to greet you each time you are near, then feed them 2 to 4 times a day (still only what they can eat in a few minutes). The more you feed them the more nutrients will be in the pond to feed algae and plants. If you have a lot of plants algae may not be an issue. If you don’t, algae might creep in on you. Some algae is okay. If you have the expectation of no algae, feed the fish less.
  4. Nutritional needs of koi change as the water temperatures change.
    • The fish will eat more when the water temperature is between 60 and 85 degrees. They eat less when it is above 85 degrees and will eat less when it is below 60. Do not feed them at all below 50 unless you have special winter food and then do not feed them below 45 degrees.
feeding fish in outdoor water features

What type of koi food is best?

They need more protein, energy and vitamins when the water is above 60 degrees. Labels on fish food will tell you what you’ve got. Remember that if you are not growing show koi to enter in koi exhibits, you do not have to get the very expensive fish food!

Looking at labels

Info for outdoor water features
Protein Content

During the summer they need a protein-rich food to help them grow and to keep their colors vibrant. The label on the back of the fish food should show the ingredients and the percentages. Look for a between 30 and 40% protein for summer feeding (when the water temperature is over 60 degrees). More than 40% and the fish have a hard time digesting it.

The source of the protein is important too. Offering food that has protein from sources that are similar to what they might find in the wild is the most healthy. Some fish foods have protein in the form of fish meal, shrimp meal, anchovy, or herring meal. This is good quality protein for koi.

Koi and goldfish diet in outdoor water features
Crude Protein on this label is a minimum of 38%. The second protein listed is shrimp meal which is great and the fat content is just right!

A plant protein like wheat germ is not necessarily a bad thing and it gives koi energy, but we like to see a non-plant based source of protein listed first or second on the fish food label.

Fat content

Fat content should be between 3 and 10%. 6 to 10% is more for growing young koi (first 3 years of life) and after that 3 to 5% is just fine.

Color enhancement

You may see spirulina listed. This is a natural color enhancer. There are many other color enhancement ingredients that you can read about. We are keeping it to the basics here!

If you see Calcium Montmorillonite Clay listed, this helps them with digestion.

Size of pellets

Food pellets come in different sizes. The larger the koi, the larger they prefer their food. If you have a variety of sizes in the pond, use a mixture of very small and large pellets.

Measurement

Should you buy in bulk?

Buying in large quantities may be best kept for those that have 100 fish or more. Fish food can go bad when kept in the heat or when kept for long periods of time. Store the food in a cool place, out of the sun.

Do not feed food that smells rancid or has mold on it! Click HERE to learn more about storing food.

What about winter?

When the water gets down to 50 degrees you might feed them a winter type fish food which is easier for them to digest. Keep in mind you need to feed them less as well. They are getting ready for a sort of hibernation called “torpor”. This is when their metabolisms slow down and they become far less active. In the middle of the winter they may be seen sitting at the bottom of the pond not moving at all.

What about treats?

Having something on hand to feed the fish when visitors come by is a good idea! Koi Krunchies are slightly bigger than regular food and are meant to be a treat. The protein and fat are less and they are perfect to use when we want to feed the fish but don’t want to overfeed them.

treats for fish, koi food

Did you know that another great fish treat is fruit and vegetables! YES! They will eat blueberries cut in 1/2, watermelon, zucchini slices, and even sliced pineapple!

Issues?

  1. Excess algae: increase plant life, make sure you have small gravel in the pond and if you already have these things, cut back on feeding the fish.
  2. Fish are attacking water lilies: Feed them more often and feed them more. Large fish, 24″ and larger need to be fed aggressively.
  3. Fish are attacking the water hyacinth: let them! They are getting vitamins from them. Set some aside to spread and grow larger and then put them in all at once. Then the fish can’t destroy them so badly.
  4. Uneaten fish food found mushy in skimmer: lower the quantity of food being given at one time.
feeding koi

Just want to know what brand of food to buy?

I like to use a couple different brands to make sure my koi are getting everything they need.

Blue Ridge Fish Pellets Platinum Professional and Aquascape Premium Fish Food are what I have been using. They are affordable and yet they have good nutrients. The Blue Ridge food doesn’t come in different sizes which is one reason I also use other brands. The pellet is good sized, but too big for my fry.

koi food

If humans ate one nutritional food all the time without switching it up they might not get a rounded and balanced diet. It’s the same thing with koi. Giving them a variety of food with treats here and there is the best way to ensure an overall healthy and balanced diet.

For the basic backyard pond a good quality fish food helps keep the koi healthy and bright. Koi food that is far more expensive is not necessary!

outdoor fountains

Will ash hurt my pond?

Towards the end of summer, here in Colorado, there are sometimes wildfires. These often cause ash to fall into the air and into our ponds prompting us to ask, “Will ash hurt my pond?”

Falling ash problems are nothing compared to having to evacuate because of fire or losing ones’ home. We send anyone affected by fires our love and hope they are safe!

How much ash is accumulating?

Ponds and streams are susceptible and almost defenseless against the very fine airborne ash when there is a fire nearby. Ash and sediment can be problematic for ponds and fish health. It is mainly composed of organic matter from burned plant material and contains concentrated nutrients.

Too much ash can:

* raise the pH of the pond water

* prohibit oxygen and clog fish gills

*cause an algae bloom

*clog filters

This should not be an issue unless you really have a noticeable amount of ash collecting in your yard. If this is the case, you will likely see it in the pond and there may be an excess of foam. Ash can clog up the gills of a fish making it difficult for them to get oxygen from the water and if severe enough, can kill them.

The content of ash raises the pH level of the water. If your area is experiencing a high level of ash fallout you need to do a water change to make sure fish can obtain oxygen from the pond water without getting clogged gills. Make sure to use a dechlorinator when you are adding hose water as it contains chlorine.

In most cases, you might see a small amount of ash and may not realize it is there at all. You may notice it as dissipated foam on the pond from the ash as shown in the picture below. Keep an eye on the fish to make sure they aren’t acting oddly.

Will ash hurt my pond?
This small amount of foam on the pond is from the ash falling in.

Small amounts of ash should not harm the system.

This organic ash has a high potassium content. Potassium is a great nutrient for the plants in your pond.  If there is ash falling, but not collecting in the yard, it could actually be beneficial.

I would not be surprised if the ash caused an algae bloom at first and then as the plants grow more vigorously with the added potassium, the algae will lessen.  The plants will look lavish and lovely and as they do, the algae should diminish.

Ash won’t kill algae, but a small amount of it can actually benefit the plants. Want to learn more about pond algae and what to do about it? Click HERE.

outdoor fountains

Water Hyacinth – a workhorse in a Colorado pond

Water Hyacinth Blooms

Water hyacinths put out soft purple blooms that can be from 4 inches to 12 inches tall! I have observed that the hyacinth in my pond does not bloom but the ones in my waterfalls do. My theory is that because they are very sensitive to water temperature, that the pond water is a little too cool.  The stream water is more shallow and therefore has warmer water. If you have blooming hyacinth in your pond, take a picture and shoot it over to us!  Also if you want your hyacinth to bloom try putting some in the stream or waterfall and see what happens. 

Blooms in outdoor water features

Reproduction

Reproduction – Having one is like having 100! 
Water hyacinth reproduce extremely quickly by putting out multiple shoots with new plants on them (plantlets).  They will stay attached for a while but when picked up or moved these easily break apart.  These new plants will follow suit and before you know it there are more hyacinth that you can imagine.

Luckily, they are annuals here in Colorado (Zone 5) which means they will not overwinter.  When there are too many, just throw them out! (Also great for the compost). Originally from South America, they are very sensitive to cold water. In southern states where the weather is much warmer they are even outlawed as even one plant let go in a natural waterway can overgrow to the point of needing to be removed! 

Hyacinth Reproduction
I started with two water hyacinths and this is a fraction of what I have now!

Filtration

Here in our lovely zone 5 these plants provide excellent filtration.  Their roots hang down into the water, often growing down 12 inches long.  They consume the nutrients found in the water, removing it so that algae has less food. 

Water hyacinth roots - excellent filtration
This is a small hyacinth – their roots are a lovely purple-black and act as excellent filtration.

Softening

Great plant for hiding edges or softening rocks! Hyacinth can be placed on the edge of a pond and kept there by placing some rocks on top of the roots to anchor them in place. They can also be allowed to get stuck in the edges of waterfalls. If they don’t get stuck enough then may need some assistance.  Putting some rocks on the roots to help them stay in place will allow them to cascade down the waterfalls as they form new plantlets. 

Softening in outdoor water features

Fish Nutrition

Koi will eat the roots of water hyacinth!  I keep mine in the waterfall until I have a plethora of them.  Then I put some into the pond.  They provide first rate nutrition for the koi. 

What about when they float into the skimmer?

If you have given up on water hyacinth because they were floating into the skimmer, or you don’t want the fish eating them, try one of the following:

  • Tie them with fishing line to a rock so they can’t be swept into the skimmer.
  • Purchase a floating plant net that protects them from the fish eating the roots, allowing them to continue to provide filtration. This keeps them from getting caught in the skimmer.  You can easily use fishing line to tie them to a rock and it will hardly be visible.  (See picture below).
  • Put them in the waterfall.
  • Put them in the biofall.
Water hyacinth in plant protection net

Want to know more about the 5 Elements to a healthy Pond? Click HERE.

Need more information about pond algae? Click HERE.

outdoor fountains

Koi Pond Algae – What is it and how to treat it.

Does it ever seem like it is algae season? Koi pond algae can be unsightly, but it’s not all bad.

It turns out that there ARE algae seasons!

Just as there are seasons for certain types of vegetables and flowers, there are seasons for particular types of algae as well. Many people call us when koi pond algae pops up and we want you to know that you are not alone!
Although there are thousands of type of algae we simplify it down to 3 types of algae for treatment in ponds.  

String Algae

This is sort of hairy and long algae. It can be pulled it off by hand and you’ll notice it’s not really slimy and has a fibrous feel. A small rake or flat broom works to remove it and it often really holds on to the rocks. It can grow on water lilies too, making it more difficult to get out.

Believe it or not, while this algae can be unsightly, it is helping to keep your water healthy by consuming nutrients in the water. Even in a healthy pond this will pop up now and then. Just pull it out.

When there is a significant amount of it in a shallow stream, we recommend turning the pump off, removing the string algae and then sprinkling EcoBlast (by AquaScape) on, following the directions on the container and letting it sit for a hour. Two days later make sure to give the pond an extra dose of beneficial bacteria.

koi pond algae
This shows string algae. It may look like there are 2 different types of algae in this picture, but these are the same. One is under the water completely and one is floating.  A UV light has no affect on string algae.  A little algae is okay and it needs to be kept under control.  An Iongen can keep algae under control. Removing the algae, treating it with EcoBlast and then installing an Iongen (follow directions carefully) will keep string algae away.

Suspended or Microbial algae

This type of algae looks a lot like green pea soup. While this won’t hurt the fish, it is not pleasant to look at. This is a sign that the ecosystem of the pond is out of balance. Click on this link to the 5 elements to a Healthy EcoSystem to see what is missing.

Adding new plants and consistently dosing with beneficial bacteria will help get the pond back in order. When it is difficult to add marginal plants or when adding gravel is not an option, try adding a pressure filter with a UV light.

Koi pond algae
This green pea soup algae is “suspended algae” or “microbial algae”.  This tells us the ecosystem is out of balance.  A UV light will clear this up if getting the ecosystem in balance is problematic.  Try putting in an Aquascape pond gummy or the Autodose treatment called “Clear”.

When can koi pond algae show up?

Green Algae (both string algae and suspended algae) can appear at anytime but seem to have certain times when they grow the most. Again, this is because the nutrients are just right for them mid-June. The more plants you have, assuming good circulation and aeration, and consistent bacteria, the less algae you will have.

Koi pond algae
Do you ever get this fuzzy algae on the rocks? This just tells us that there are more nutrients in the water than the plants can keep up with. Brush it off with a stiff brush. Add more bacteria, add more plants.
koi pond algae on lily pad stems
The fuzzy algae will even accumulate on the stems of the lily pads. Not only is it not hurting anything, but it helps keep the water clean. Fish will also snack on it.

Diatom Algae

Diatoms show up as a slimy, filmy algae that covers everything.  This is generally golden/brownish/green in color. This may pop up in the spring and early summer.  This thankfully should die back as the conditions change (warmer water and more sunlight). A pond with this sort of algae may need work on the 5 Elements in a Healthy Pond.

Algae in outdoor water features
This bubbly, slimy algae tells us the ecosystem really needs help!  It may require a full cleanout and balancing of the 5 elements of a healthy ecosystem. Lots of beneficial bacteria will be needed to fight this off. 

It turns out that there ARE algae seasons!

The graph below shows the basic seasons of algae. Diatoms pop up early in the season because the aquatic plants and beneficial bacteria are not active yet. The nutrients in the pond are going to be consumed by something, so diatom algae comes in to do the job.

Algae in outdoor water features

Blue Green Algae – Blue Greens (Cyanobacteria) are on this graph and are typically not found during colder springs.  They do come up when we have very warm springs.  This is not a typical koi pond algae and we have never see this in the koi ponds we visit. It sometimes comes up in very large ponds.

Knowing the Ins & Outs of Beneficial Bacteria

Remember that beneficial bacteria needs to be added in weekly and extra at certain times. Read more about Beneficial Bacteria by clicking HERE. (Really there are things you need to know. If you are storing it improperly or using it incorrectly, it won’t help you at all! )

outdoor fountains

Why are my lily pad leaves turning yellow?

The leaves of the water lily last for 3 to 4 weeks.  Then it turns yellow and brown and then gets mushy and sinks. This is a normal part of the life cycle of lily pad leaves.  The plant will produce more leaves as older ones die off. 

If your lily pad gets black or burnt looking spots on them that may not be normal.  When it is really hot (yes, it has been really hot here in Colorado lately; ask anyone without an air conditioner!) if the pads get splashed or sprayed with water, it can sit on the leaf and act as a magnifier.  This can burn small places on the pads that look like brown or black round places. This can also happen from fish food that lands on a pad and then stays there too long. 

Yellow lily pad

Things to know about hardy water lilies :

  1. 10 inches of water above the soil line. 
  2. Lilly pads will flower more when they have at least 6 hours of sun daily.
  3. A lily pad flower lasts for about 4 days.  It opens in the morning when the sun is starting to get bright, about 9:00.  It closes up about 5:00 and will reopen the next day.
  4. When lily pads are purchased at a nursery, they need to be repotted into a wide pot. Let us know if you need more information about potting!  They should be fertilized too! 
  5. When purchasing lilies, know that if it called a “red” lily, it is usually dark pink, not cherry red! 
lily pads in outdoor water features
The torn leaves of the lily pads on the left side of the picture were damaged by hail.

To read more about hail and your pond click HERE.